|
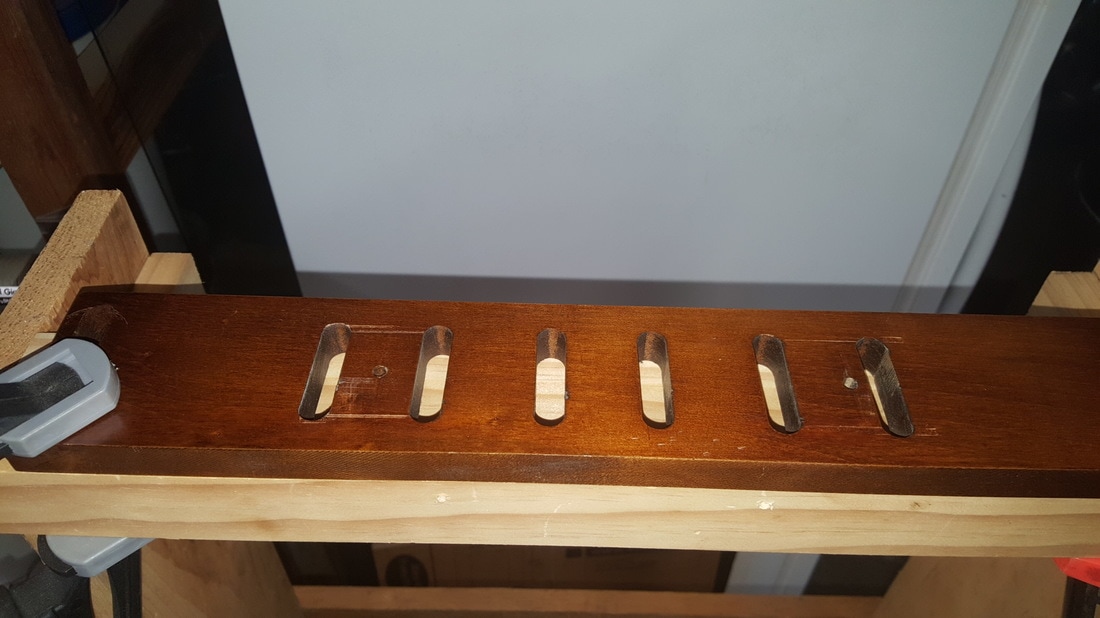
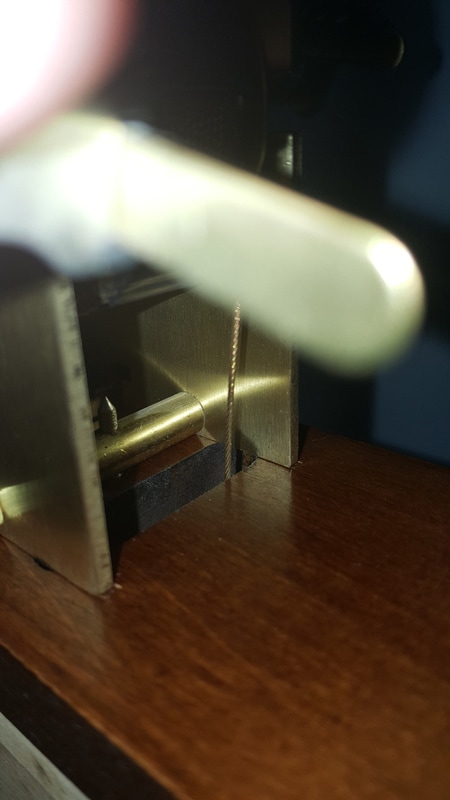
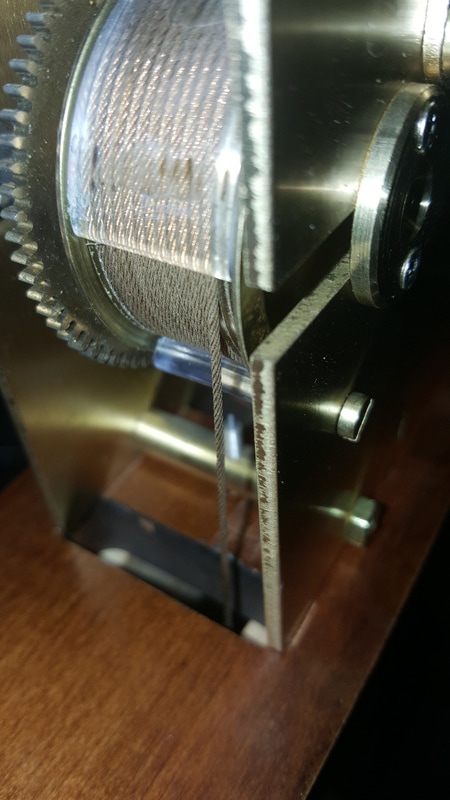
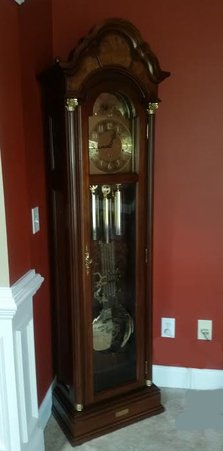
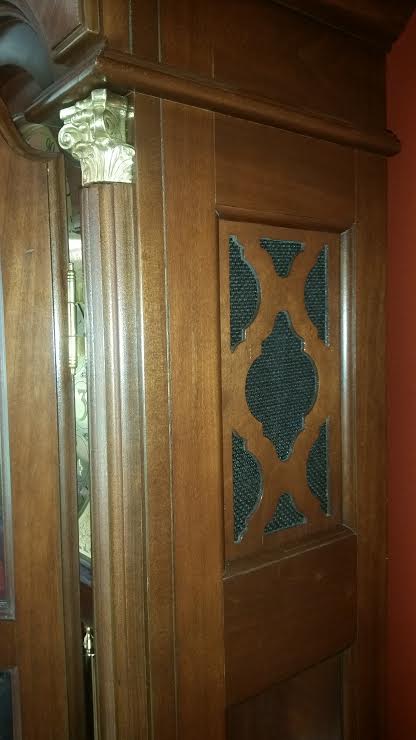
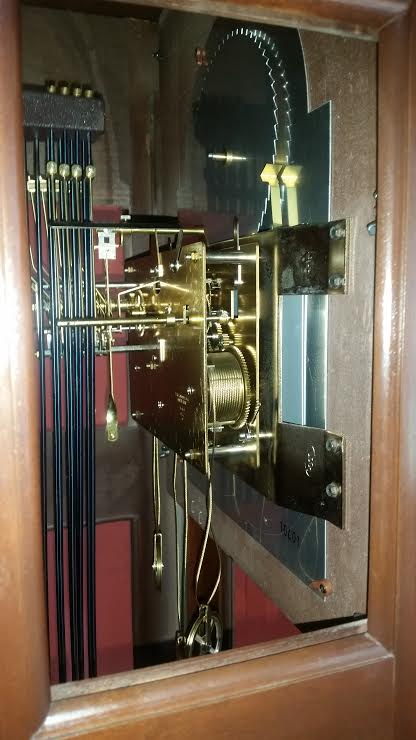
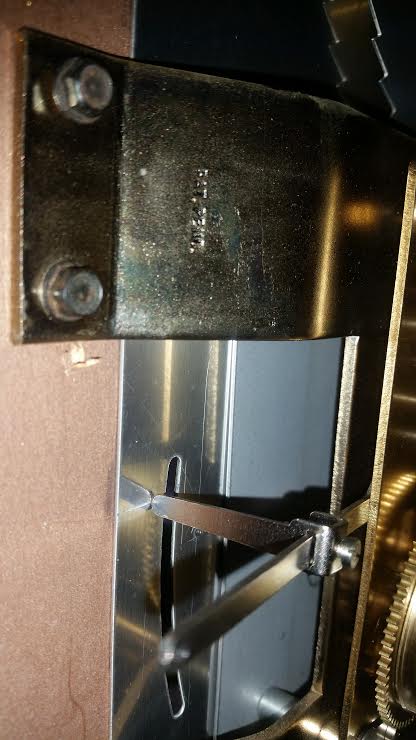
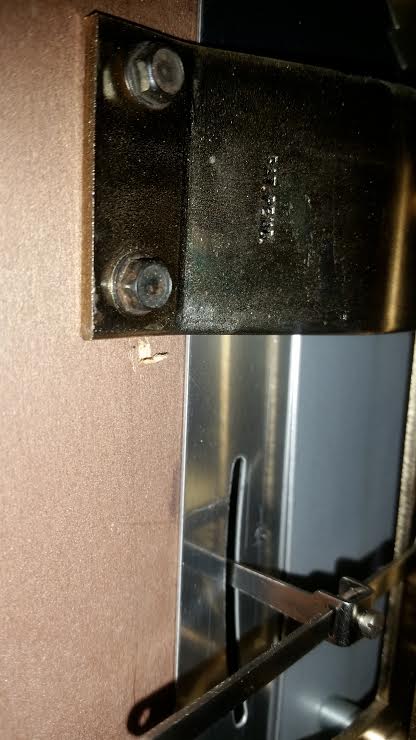
The other day we had a call for a Sligh Grandfather clock was chiming erratically. The customer said the chiming would be fine on the quarter hour sometimes then other times it would stop, then start up again and sometime it would be silence for days. We went out to the call and the Sligh Grandfather clock was only about 10 years old, however it had some major surgery performed on it by a competitor of ours out here in the Atlanta Metro area. The competitor had replace a few bushings in the clock movement. The customer indicated that the strange chiming had started immediately after the other company had repaired the clock. At first I did not see any problems, so I removed the movement to clean and service it. After all was cleaned and re-oiled, I re-installed the movement and the clocks chiming side was chiming erratically again. After carefully looking at everything, I finally saw the problem. The clock's movement was on the seat board, however the seat board was backwards and the chiming side cable was rubbing the edge of the seat board, causing friction and stopping the weight from pulling the cable down properly. Luckily, it was an easy fix. I simply removed the movement again, turned the seat board around to its correct position and all is working fine. I have included some pictures to help you see what I saw. Sometimes, its the simple things that we overlook, that gets us in trouble when troubleshooting a problem with Grandfather clocks. In the above picture you can see that the chiming cable is rubbing on the seat board In the picture above, you can see the cable now is in the center of the seat boards slot and can clearly pass through and not rub on the side of the seat board. Again, sometimes its the simple little things we overlook on the troubleshooting of Grandfather clock repairs. The clock repair service that had replaced the bushings, had re-installed the seat board on backwards and this is where all the customers new problems started.
2 Comments
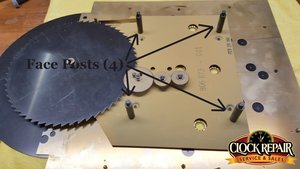
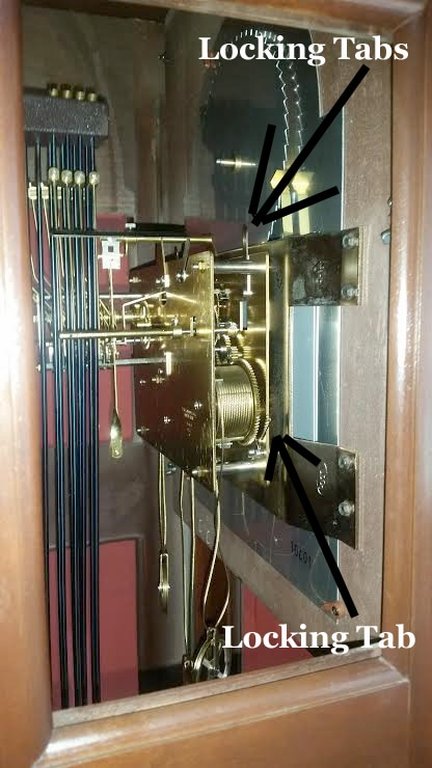
The following posting will help our customers replace a movement in one of many Colonial Grandfather clocks. Colonial Clock Company made several different models and types of Grandfather clocks. Different models used different movements. The movements attached to the clocks case in a few different ways. The following is an instructional blog to help you replace your movement on a colonial Grandfather clock that its movement attaches directly to the Grandfather clocks face. The Grandfather clocks face is mounted to the front upper case using a special mounting bracket that is noted in the pictures. The movement is attached to the clocks face using 4 face post, located on the Grandfather clocks face. The face post are locked into place using a locking tab. The 4 locking tabs are all that holds this style movement and once the 4 locking tabs are moved to unlock the face post, the movement will drop down through the bottom of the Grandfather clocks case.
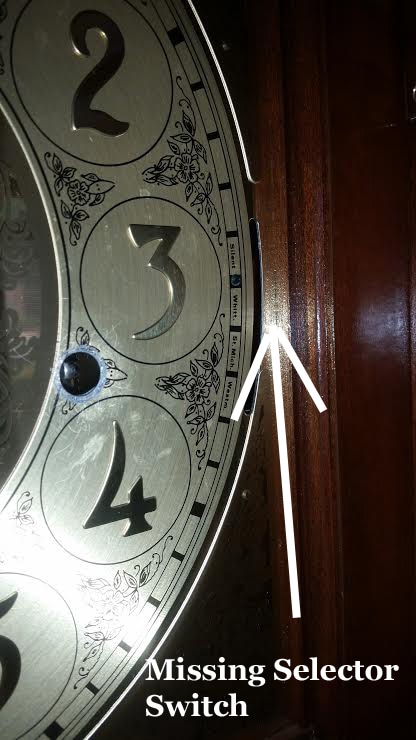
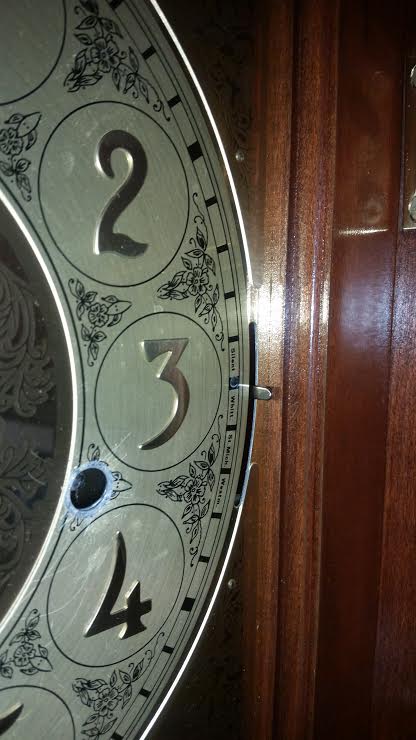
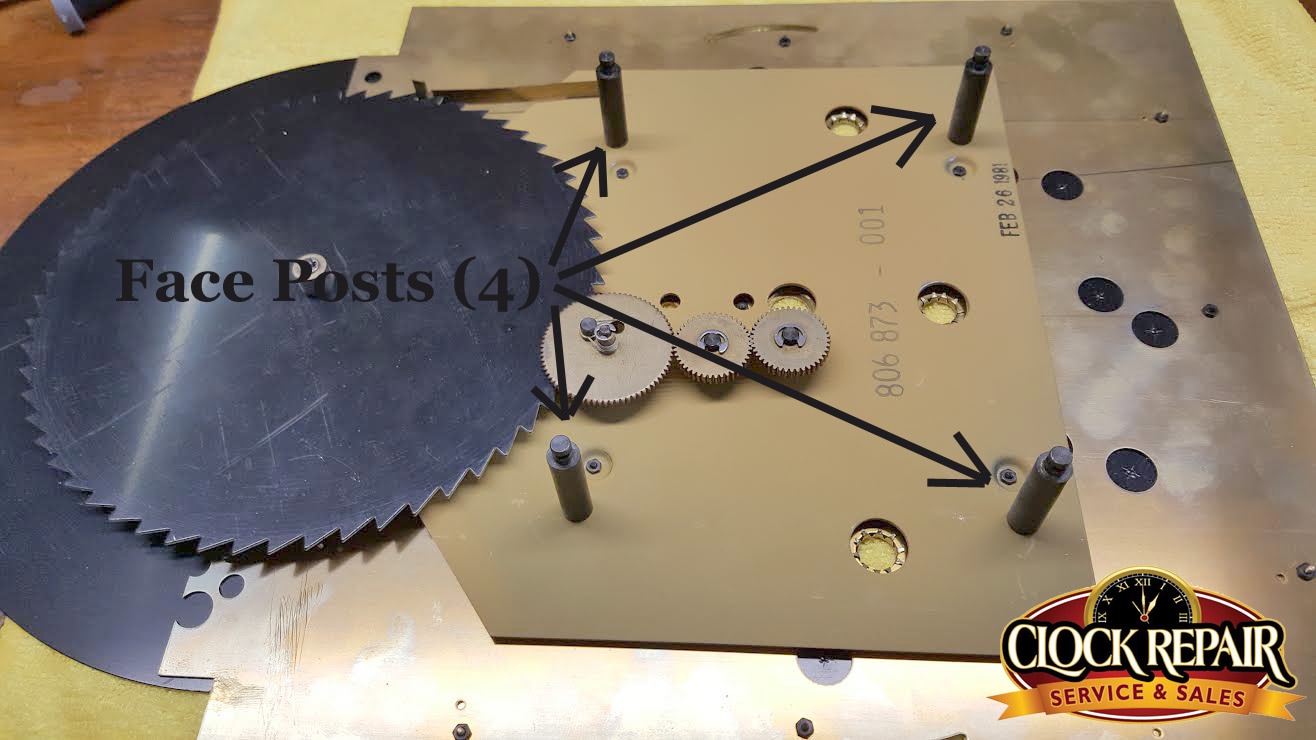
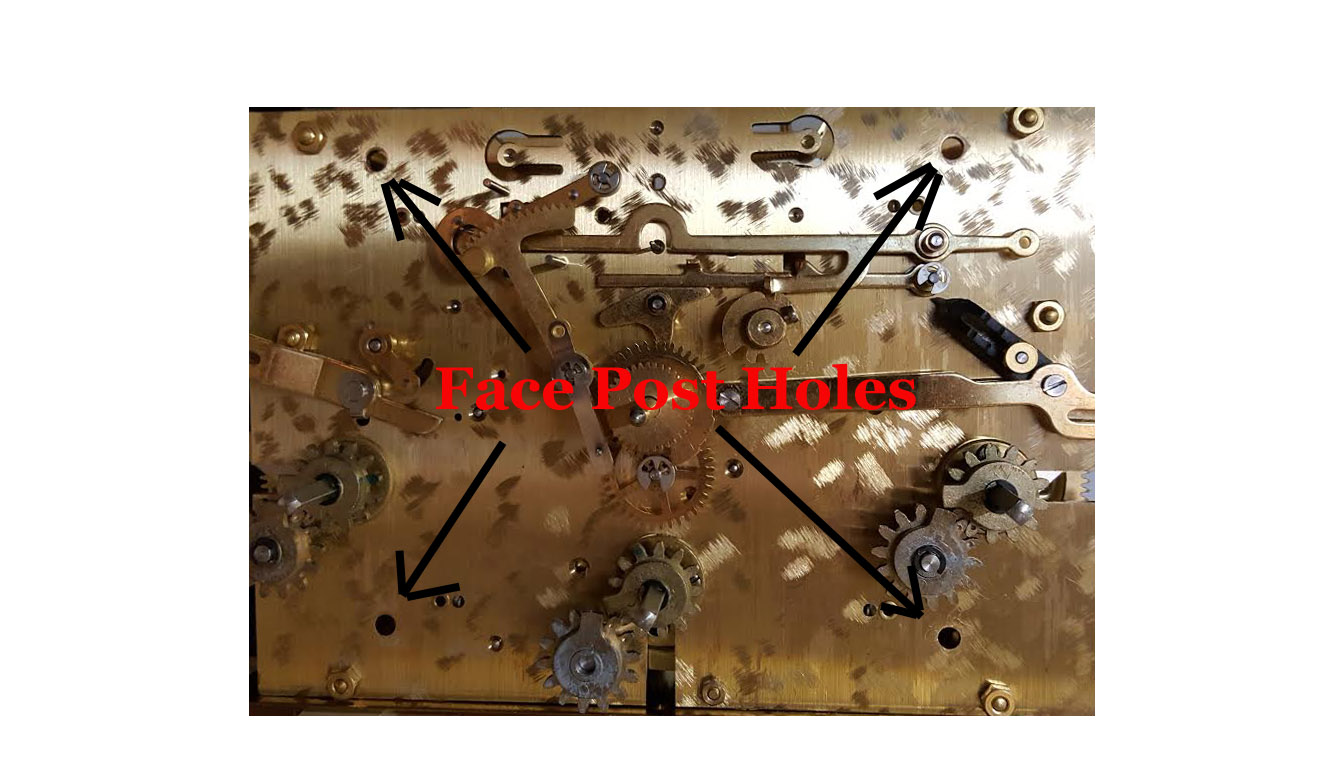
In the picture above, you will see the locking tabs on the Grandfather clocks movement. There are a total of 4 locking tabs. 2 on each side, 1 on the top side of the movement and 1 on the bottom side of the movement. The top 2 will slide down toward you and the 2 on the bottom will slide up away from you. Prior to removing the movement from the Grandfather clock case, you will have to remove the hands from the clock movement. This is done by removing the nut that holds the hands on to the movement. Once the nut is removed, you will be able to gently pull the minute hand off. Once the minute hand has been removed, you will be able to remove the hour hand by gently wiggling the hour hand back and forth, pulling on it gently. Now that the hands are off, you will need to remove the movement from the grandfather clock case. PLEASE READ THROUGH THIS PART BEFORE SLIDING THE LOCKING TABS. 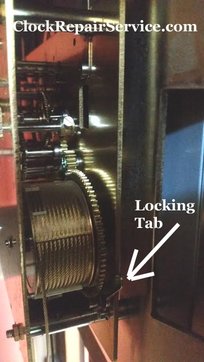 When you slide the locking tabs, the movement will start to come out. If you are not careful in this process, you might drop the movement and damage the clock. The door to the Grandfather clock is always in the way, no matter what we do on these repairs, so with that said, you will slide the locking tabs on the "HINGED " side of the door first. Once the 2 locking tabs are loose on the hinged side of the door, you will un-lock the other 2 locking tabs on the other side of the Grandfather clock. Rest one of your hands under the center of the clock movement by reaching in through the open door. When you unlatch the 2 remaining locking tabs, the clock movement will want do drop down quickly. You could damage the clock as well as the chime rods, so make sure your free hand is able to hold the movement as you un lock the locking tabs. Once you have un latched the last locking tab, the movement will be free from the face. Carefully move the movement back towards the backside of the case and lower the movement in your hand. Carefully watch to make sure you do not get any part of the movement hung up in the chime rods. Once the movement has cleared the chime rods you can safely remove the movement out through the front door of the Grandfather clock. The movement is now removed and ready for repairs, cleaning or replacing. When you are ready to re-install the movement you will simply revers the prior steps when re-installing the movement. There are a few tricks for re-installing the movement. One is when you re-install the movement and you are lining the locking tab holes up with the face posts, the moon gear will not line up properly. If you feel resistance from the center of the face where the moon, you can re-install the minute hand and rotate the hand clockwise. This will allow the moon gear to line up properly with the other gears on the face. Sometimes you will hear a loud "pop" and that will indicate the moon gear is lined up correctly. The moon gear is not really visible when you are re-installing the movement, so you might have to go by feel on this one. The only other problem is the chime selector switch might not line up with the slot on the right hand side of the face (near the #3). The picture below will show you how this switch gets out of alignment when re-installing the moment. The above picture shows how the selector switch did not line up with the slot. The above picture indicates the selector switch in its proper position The above picture shows the selector switch from the back side of the face, not lining up properly with the slot in the face. You can gently slide the selector switch into the grove, don't force this selector switch, it is flexible and will move into its slot. The above picture shows the selector switch in its proper slot. We service over 700 Grandfather clocks per year in the Atlanta Metro area. Our company gets many calls and emails from people all over the country, that asks us for help on some of the repairs to their Grandfather clocks. We will put together several short instructional blogs to help everyone that can't find a clock repair person in their area, or would just like to do their own repairs. When someone purchases a new movement from us, there are a few things that will need to be performed, prior to re-installing the new movement. One of the tasks to be performed will be to re-install the old Grandfather clocks face to the new Grandfather clock movement. I have posted a few pictures to help you understand how this is done. The first picture is of the face, upside down. You will notice the 4 posts on the backside of the face. These post will line up with 4 matching holes in the movement pictured second. There are several ways to get the face to fit on the movement, However I will discuss the way I was tough and the way that is easiest for me. Feel free to try other methods that might work best for you. First and most important. Before you touch the face of your movement, you will need to put on a pair of either latex or cotton gloves. You do not want to touch the face with your bare hands. If you already have, wipe the Grandfather clocks face with some Windex or some type of glass cleaner. Please use it sparingly and do not wipe hard, you could remove the lettering on the face. Once its clean and you have your gloves on, place the movement face up toward you. Look around the face post holes. On the inside of the front side of the movement, you will see silver locking levers at each hole. The picture below will show you what you are looking for. There are 4 of these locking tabs, 1 for each hole. Before you try to line the face up to the movement, study these locking tabs, notice that when you move them one way, they will cover up the face post holes on the movement. Move them so that the holes are not being blocked. 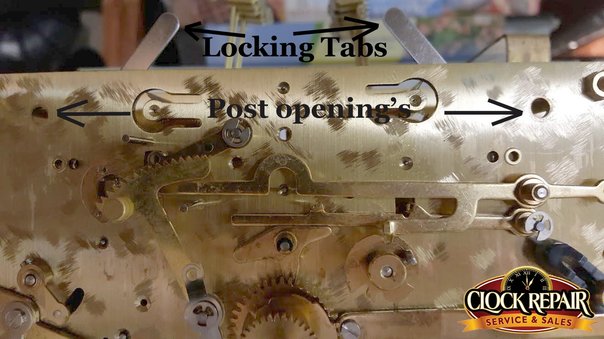 Once the locking tabs are clear from the face post holes, you are ready to install the face onto the movement. Place the face upside down in one hand. Bring the movement over to the face , lining up the hand shaft with the center hole on the face, lower the movement down to meet the face. The face post will move a little and sometimes will not line up perfectly with the face post holes in the movement, You will have to move the face posts to meet the face post holes. One challenge to installing the face is the moon gear will sometimes not line up with the face gear, so you will have to move the moon gear around as well to help the face posts to drop down into the face post holes. Once the face posts are seated into the face post holes, you will need to move the locking tabs over so the locking tabs will lock into place and hold the face onto the movement. Once the locking tabs are in place, your Grandfather clocks face is installed onto your Grandfather clock movement. You will be able to install the Grandfather clocks hands onto the movement now and re-install the movement into your Grandfather Clocks case. We will post additional information as questions come in to our shop that we think will help with repairing your Grandfather clock yourself. Please feel free to ask us questions and we will try to post instructions to help. |
About Us:
Clock Repair Service has been in business for over 10 years now. We service more Grandfather clocks than any other clock company in the state of Georgia. We have 2 Grandfather Clock Technicians that are on the road Monday - Friday repairing 2-3 Grandfather clocks per day, EACH.. That's allot of clocks in the past 10+ years. Our service area at this point is from Chattanooga, Tennessee down to Macon Georgia. The bulk of our Grandfather Clock repairs are however, in the Metro Atalanta area. We service Grandfather clocks ranging from 200+ years old to current models. We do service all brands of Grandfather Clocks and we are an Authorized Sales and Service center for both Howard Miller and Ridgeway clocks. Archives
April 2023
Categories
Let us know if you have any questions 678-462-7856
|
.

 RSS Feed